
Looking for an easy way to shape consistent, grill-ready burgers without the mess?


Product overview
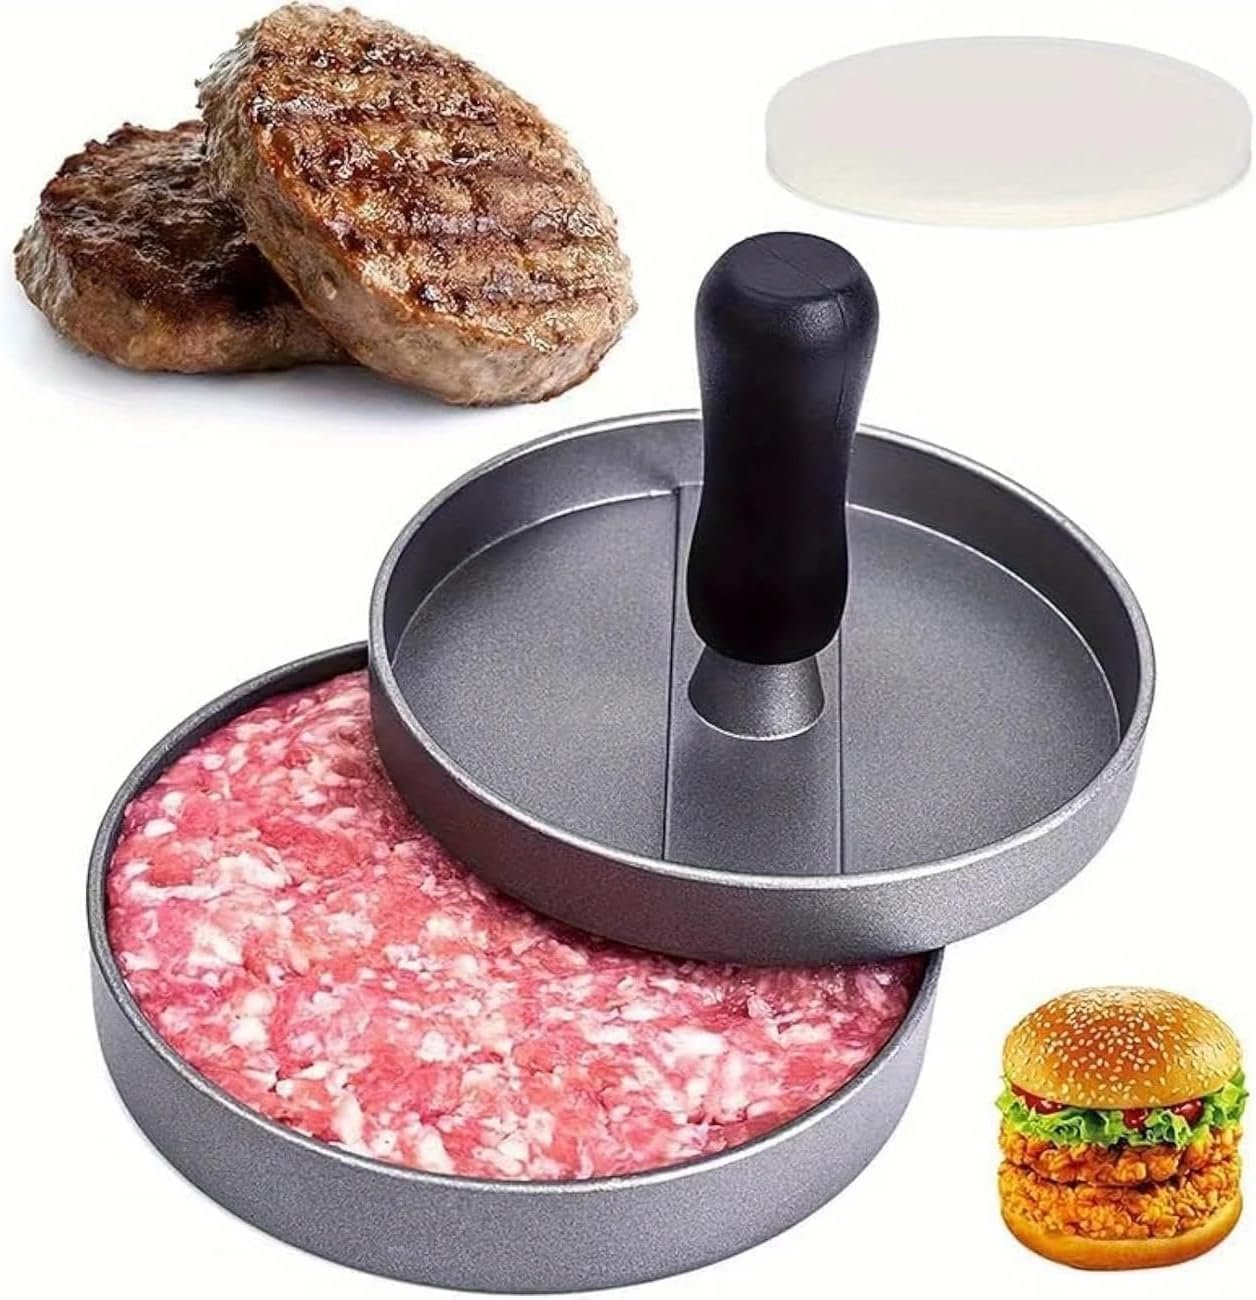
You’ll find the “1PC Burger Press Non-Stick Hamburger Press Patty Maker Mold | Meat Beef Cheese Veggie Burger Maker for Grill Griddle BBQ Barbecue” aims to make burger preparation fast and uniform. The product name tells you it’s a single-piece press with a non-stick surface designed for forming patties from a variety of fillings — beef, cheese-stuffed burgers, veggie mixes, and more.
What this product promises
You can expect uniform patty shape and thickness every time, aiming to help your burgers cook evenly and fit standard buns and griddles. It’s marketed toward home cooks who want a simple, repeatable way to make patties for grilling, pan-frying, or oven baking.
Key features at a glance
These feature bullets give you a quick idea of what matters when picking a burger press. You’ll want to check these points against the actual listing or product packaging before purchase to confirm exact specs.
- Non-stick surface for easy release and minimal oil use.
- Single-piece (1PC) design for straightforward operation and quick cleanup.
- Mold built for standard burger sizes; likely accommodates portion control.
- Multi-use for meat, veggie mixes, and stuffed/cheese-centered patties.
- Compact and lightweight for easy storage.
Why these features matter
Uniform patties help your burgers cook evenly and sit nicely on buns, which improves both taste and presentation. A non-stick surface keeps you from having to use excessive oil and makes releasing patties less of a chore.
Product specifications (summary table)
You’ll get a clearer snapshot when you compare the core details in one place. The table below summarizes the typical attributes of this category and what the product name suggests — verify exact numbers on the seller page if you need precise dimensions or material certifications.
| Attribute | Typical/What the name suggests |
|---|---|
| Product name | 1PC Burger Press Non-Stick Hamburger Press Patty Maker Mold |
| Pieces included | 1 piece |
| Surface finish | Non-stick (coating) |
| Intended use | Beef, cheese-stuffed, veggie burgers, grill, griddle, BBQ |
| Size/diameter | Commonly 3.5–4.5 inches (check listing) |
| Patty thickness | Often adjustable by pressing depth or by amount of filling |
| Material | Frequently food-grade plastic/nylon or coated metal (confirm listing) |
| Dishwasher safe | Often hand-wash recommended despite non-stick claims |
| Weight | Typically lightweight for single-piece design |
| Price range | Usually budget-friendly (inexpensive kitchen gadget) |
Design and build quality
The overall design usually focuses on simplicity: a mold cavity and a press surface that you use to compact the filling. You’ll appreciate machines that avoid moving parts because there’s less to break and fewer crevices to clean.
What to expect from the single-piece design
With only one piece, you’ll find operation intuitive — scoop, press, and release. The trade-off is that you may have less mechanical leverage than multi-piece or spring-activated presses, so you’ll rely on your own hand strength for compaction.
Materials and non-stick performance
Non-stick is the headline claim, and it’s worth checking how well that holds up in practice. Non-stick coatings vary: some are slick and durable, others can flake if treated roughly or exposed to high heat.
How the non-stick coating affects use
A good non-stick surface helps you form patties with minimal oil and clean up quickly. If the coating is lower quality, you might find small bits of mix sticking or coating degradation over time. You’ll want to use plastic or silicone utensils with non-stick coatings to avoid scratching.
Size and portion control
Getting consistent burgers is one of the main benefits of a press. You’ll be able to control the size of each patty by the amount of filling you place in the mold and how firmly you press.
Typical portion sizes and how to measure
Press molds commonly match standard recipe sizes — for instance, two to four-ounce patties for smaller sliders or six to eight-ounce patties for hearty burger servings. Use a kitchen scale to portion your filling for precise consistency.

Ease of use
You’ll notice that single-piece presses are usually straightforward: no complicated assembly, no extra attachments, just fill and press. That makes the tool friendly for busy cooks or those new to forming patties.
Step-by-step basic usage
You’ll want to follow a few simple steps each time:
- Lightly oil or dampen the mold if needed.
- Place the measured meat or mix into the cavity.
- Press firmly and evenly to compact and form the patty.
- Release the patty and transfer to your cooking surface or plate.
Cleaning and maintenance
Keeping a non-stick press looking and performing well is easy if you follow a few care rules. You’ll extend its life if you avoid abrasive scrubbers and high heat.
Recommended cleaning practices
Hand wash the press with warm, soapy water and a soft sponge. If the listing claims dishwasher safety, consider placing the press on the top rack and using a gentle cycle to preserve coating integrity. Avoid metal scrubbers and very high dishwasher temperatures when possible.
Cooking performance: how your burgers will turn out
A press helps create uniform patties that cook consistently across the grill or pan. That means fewer overcooked edges and undercooked centers, leading to juicier results.
Tips for better cooking results
You’ll get the best results if you:
- Don’t overwork the meat; press just enough to hold the patty together.
- Make a small indentation in the center to reduce bulging while cooking.
- Preheat your grill or pan so you get a good sear immediately.
- Use a thermometer for safe doneness, especially with ground meat.
Versatility: more than just beef
You’ll find that this press works for veggie burgers, chicken, turkey, pork, and even stuffed creations where you encase cheese or other fillings. It’s also handy for forming crab cakes, falafel patties, and even certain desserts like cookie sandwiches when used carefully.
Stuffed and specialty burgers
To make a cheese-stuffed burger, you’ll press a thin base patty, add a piece of cheese or a mixture of fillings, then top with another thin layer and reseal before pressing. The press helps hold everything together for safer transfer to the grill.
Pressing techniques and recipe ideas
Technique matters as much as the tool. You’ll find success when you combine proper portioning with the right amount of compacting and seasoning.
Basic beef burger recipe (framework)
You’ll want to use freshly ground meat (80/20 ratio is common for juiciness), salt, pepper, and optional mix-ins like minced onion or spices. Portion by weight, fill the mold, and press with consistent force to form even patties.
Veggie burger suggestions
You’ll achieve better veggie burgers if the mixture includes a binder like egg, flax egg, or cooked grains. Press gently so the patties hold but aren’t compressed into a dense puck.
Tips for grilling, griddling, and pan-frying
Different cooking surfaces require slight adjustments. You’ll get great results if you adapt your technique.
Grill and griddle tips
Preheat your grill or griddle hot enough to create a sear. Oil the cooking surface slightly to reduce sticking. Flip once late in the cook to preserve juiciness and sear marks.
Pan-frying advice
Use a heavy skillet and medium-high heat. Resist the urge to press down with a spatula — that squeezes out juices. Let the patty form a good crust before turning.

Safety and food handling
You’ll need to practice safe handling because ground protein has a higher rate of bacterial contamination than whole cuts. The press itself becomes part of your workflow and needs careful cleaning to avoid cross-contamination.
Safe food practices with your press
Always wash the press immediately after handling raw protein. Use separate plates and utensils for raw and cooked patties. Cook beef to at least 160°F (71°C) and poultry to 165°F (74°C) as a general rule.
Storage and durability
A single-piece press is easy to store because it takes up little space. Durability will depend mostly on the material and coating quality.
How to store and keep it lasting
Keep the press in a dry, cool cabinet. Avoid stacking heavy items on top of it if it’s made of softer plastic. If the non-stick coating starts to flake or degrade, it’s time to replace the tool.
Pros and cons
You’ll want a balanced view before deciding if this product fits your kitchen. Below are the typical advantages and drawbacks for a 1-piece non-stick press.
Pros
- Simple, user-friendly design ideal for beginners.
- Helps produce consistent burger size and thickness.
- Non-stick surface can reduce oil usage and make release easier.
- Lightweight and compact for easy storage.
Cons
- Single-piece design offers less mechanical advantage than multi-part presses.
- Non-stick coatings can wear over time if not treated gently.
- Lack of exact size/dimension details in some listings can make it hard to match buns or recipes.
- May require hand washing despite dishwasher-safe claims to preserve the coating.
Frequently asked questions
These are the typical questions you’ll have before using or buying a press like this.
Is the press dishwasher safe?
You’ll often see claims of dishwasher safety, but hand washing is typically recommended to preserve the non-stick coating. If you use the dishwasher, choose a gentle cycle and top rack placement.
Can I make stuffed burgers?
Yes — you’ll press a thin base, add filling, and cover with more mixture before pressing again. Be careful to seal edges so fillings don’t leak during cooking.
What size patties will it make?
Most single-piece presses aim for standard burger diameters (around 3.5–4.5 inches), but exact measurements vary by model. Check the product listing for precise dimensions.
Will it work for veggie burgers?
Yes, but you’ll likely need binders (egg, flax egg, breadcrumbs) to hold the patties together, and you should press gently so they remain tender.
See what you can get here
You’ll extend the value of the press by using it for many recipes. Here are a few starter ideas that are easy to adapt.
Classic beef burger
Use 80/20 ground beef, salt, pepper, and optional Worcestershire for flavor. Portion, press, and grill to your preferred doneness. Finish with cheese and your favorite toppings.
Cheese-stuffed burger
Form a thin bottom patty, add a cube or slice of cheese, top with a thin layer of meat, and press gently to seal. Grill carefully to avoid cheese leakage.
Black bean veggie burger
Combine mashed black beans, cooked quinoa, breadcrumbs, spices, and an egg. Portion and press gently before pan-frying or baking.
Chicken or turkey burger
Use ground poultry with aromatics and binders. Press lightly, then cook thoroughly to safe internal temperature.
Final verdict
You’ll find the “1PC Burger Press Non-Stick Hamburger Press Patty Maker Mold | Meat Beef Cheese Veggie Burger Maker for Grill Griddle BBQ Barbecue” to be a handy, budget-friendly tool if your goals are convenience, consistency, and quick cleanup. Its single-piece non-stick design favors casual home cooks and small gatherings, while its limitations lie in heavy-duty demands and long-term wear of the non-stick coating.
Who will be happiest with it
You’ll be most satisfied if you want an inexpensive, easy-to-store tool that helps you make uniform burgers for family meals, weeknight dinners, or casual BBQs. If you need commercial-level durability or advanced features like adjustable thickness settings, you might prefer a higher-end alternative.
Buying tips and final considerations
Before you buy, you’ll want to confirm the exact dimensions, material composition, and any care instructions on the seller’s page. Compare prices and read customer photos and reviews to assess real-world durability and non-stick performance.
Checklist before purchase
- Confirm diameter and thickness capacity match your buns and cooking style.
- Verify material and whether it’s BPA-free if relevant.
- Read user reviews about long-term non-stick durability.
- Check return policy in case the item doesn’t meet your expectations.
If you follow these guidelines, you’ll be well-prepared to pick a press that fits your kitchen routine and starts making burger night simpler and more consistent.

Disclosure: As an Amazon Associate, I earn from qualifying purchases.